Here is yet another Mother's Day(MD) Card. I think I made 5 in total so I have two more MD cards to share. Forgive the pics it was midnight when I finished the cards and I was super tired and had to get up in 4 hours to go to work the next day.
This one is just like the blue one I last posted but in pink and portrait instead of landscape. Which one do you like better? I did add a little Clear Wink of Stella to some of the butterflies.
So there you have it, yet another Mother's day quickie card.
So since Bekah has been born (the last 9mo - crazy right) my crafting life has basically consisted of everything cards, specifically thank you cards. I have sent out Thank you cards, Christmas cards, Dedication cards, and now I preparing to send out Thank you dedication cards. I wish someone would have told me how many cards I would be making before I gave birth so I could have gotten a jump start on things instead of feeling like I am playing catch up.
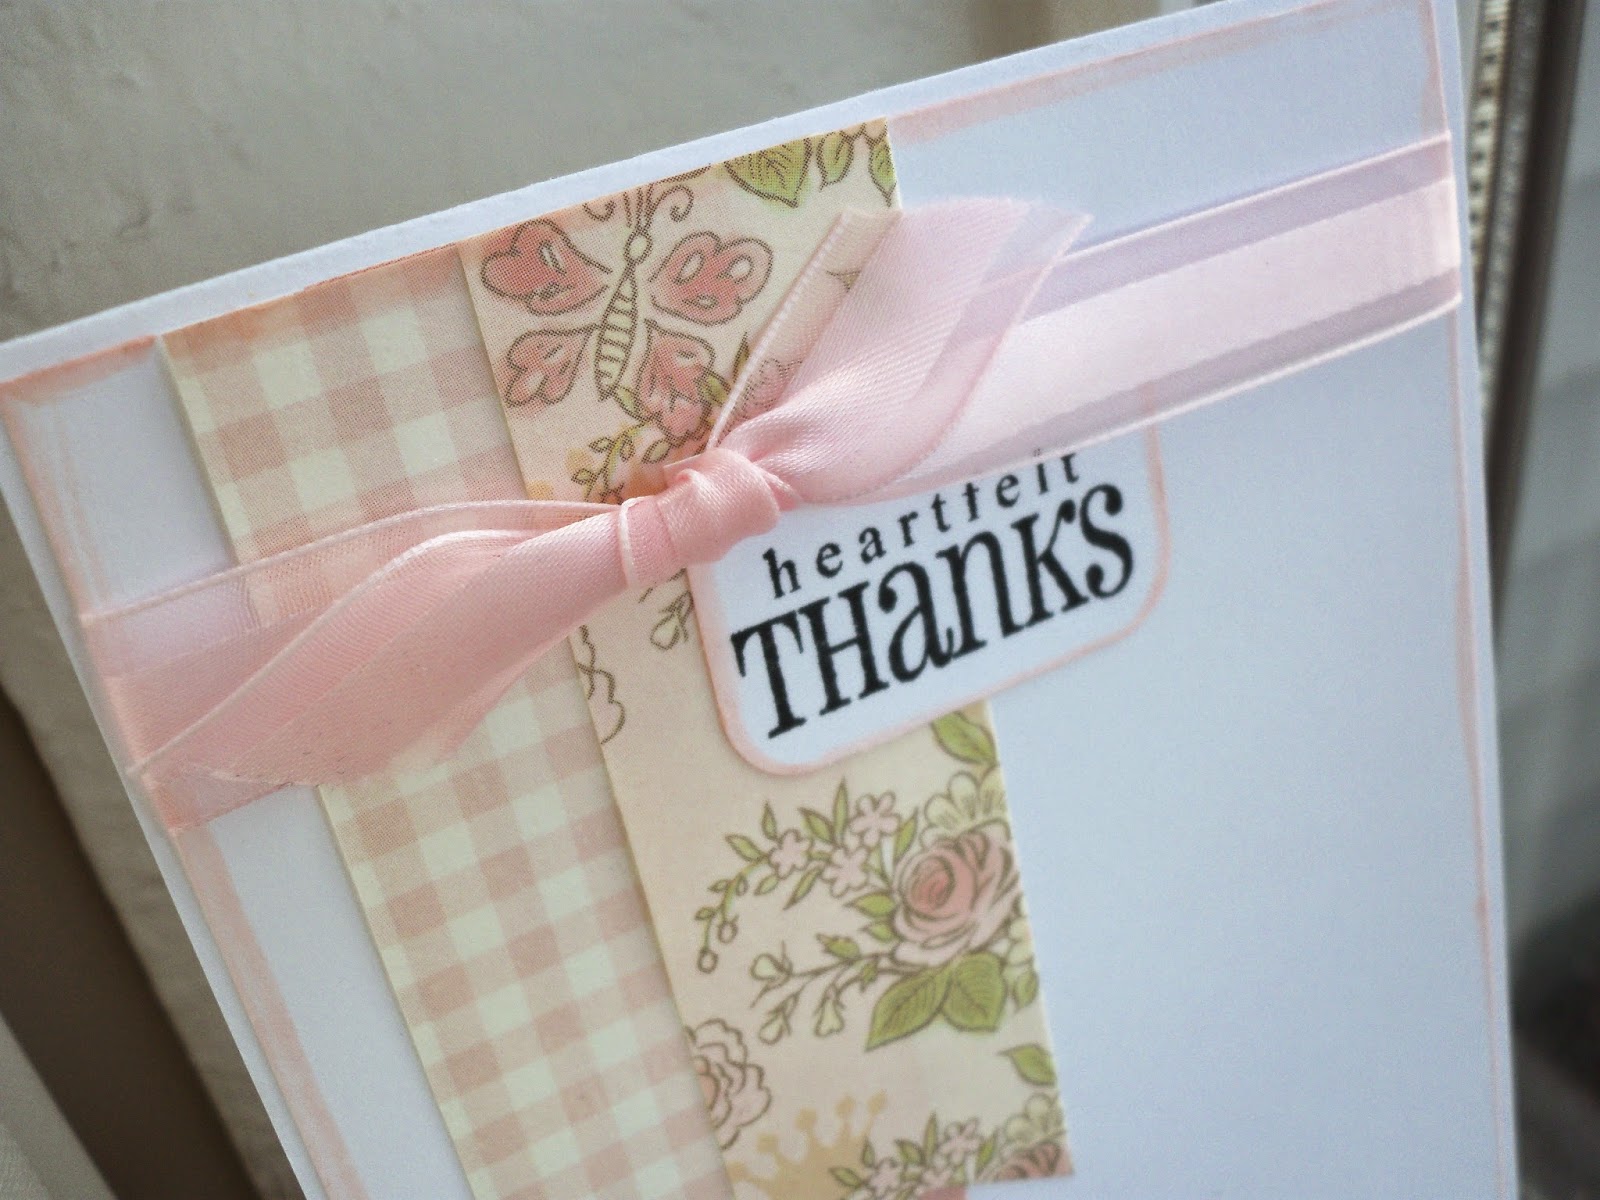
I have gone through 3 different card designs and that is where my project today comes in. To me, this may be the simplest of the three designs I have created and my fav. I love that I have only used my scraps from the DCWV Preppy Princess stack and did not have to buy anything.
First I cut my card bases, A2 4 1/4 x 5 1/2 out of white card stock. Then I cut a smaller piece of card stock 4 1/8 x 5 3/8" that I glued the design to. Cut some strips of the DCWV paper and cut the ends like a banner/fishtail. I added a ribbon and my sentiment. And finally I outlined the outside of the card and the sentiment with my Copic Rll Pale Cherry Pink marker.
I cut another smaller piece of card stock and went around the edges with the R11 marker and them stamped a heart on some of the cards and a baby hand in the bottom right corner of the others.
What's great about these cards is you can use your scrap pieces from those paper collections you have sitting around. Well maybe not you, but I know I have those pieces.
So there you have it everyone, I am prayerfully just about through with these thank yous and I should probably start working on the next set of thank yous that will be coming up, "birthday thanks". Maybe I will just work on thank you cards now, that will take her through her teen years. ;)
October is synonymous with pumpkins. We carve them, bake them, chuck them, and do a host of other things with them. Well for my SOC DT project today I used my as the inspiration for my card and I colored one.
I was gifted a stamp some time ago, love the image and have been waiting for the perfect time to use it; and today is the day.
I stamped her on kraft card stock and colored her in with my copuc markers. I love the color that you get using browns on kraft instead of white. It's like I have a whole new set of markers. I paper pieced her pumpkin outfit because sadly I have not invested in orange Copics, yet. The pattern paper I used is from K & Company, Tim Coffey Fall Mat Pad.
So there you have it, my project for today.
I hope you try coloring on kraft card stock and let me know how you like the results.
As i was going through a list of al the projects that I have created blogs for I came across some posts that I had not shared. This is one of them...
Hi Everyone,
Yes I know it has been a bit over a week since I have posted but a lot has transpired. First, I GOT A GAZELLE!!!! I am super excited! And it is up and running. It took a minute to do because I was facing opposition I needed a new/used computer so that it would not interferre with the main PC that Hubs uses to work on. So got that squared away, finally, and I AM IN LOVE.. This is a beautiful machine and I am looking for things to cut. :D I have been working on projects in the meantime though.
Today I am showing a project with a wedding theme. Being that wedding season is upon us. I love everything about weddings except for the family drama ;). Never the less, after purchasing the engagement present or bridal shower gift or the wedding gift for the happy couple, we tend to also give the newlyweds a bit of cash to help them start their new life. And that is where the money holder comes in. Instead of just giving a card I used my beautiful Gazelle, a phrase from Ms Kate Cuttables and a file from My Grafico to create this Money Envelope. I love how this came out. The file is set to be used as a vertical pocket.
I wanted to add a BIG sentiment so I cut the flap down just a bit so it matched the other side, glued it all together and viola! I adore this project. Quick and easy and perfect. This can be used for other occasions than just a wedding day but I just love how it came out.
I added some Distress ink to the letters to help them stand out and not blend into that beautiful lace.
Just sharing the mini album I made for swap at Artful Mail Groupies on Facebook. Because I had to mail this off internationally and was in a bit of a rush to make the PO, I forgot to take up-close pictures but I did manage to pull together this video of the album.
I cut my bags in half and trimmed them down so that from one bag I have two 4.25" x 4.75" pieces. Tags:
My large photo mats were cut at 4.25" x 4 5/8"
Designer paper was cut at 4" x 4 3/8"
Small tags cut at 2.75" x 4 5/8"
Small tag designer paper 2.75" x 4.5"
Binding:
I used a method similar to the "hidden hinge" method by Kathy Orta
Cover:
Recycled Chipboard cut at 4.75 x 5"
What I used..
~Black Celebrate It Bags
~Recollections Black Card stock
~Prima Lyric Paper Collection
~Trico Flowers and Leaves
~Recollections flowers
~Bridal Pearl Brads
~Bridal Stamens
~Studio G Pearls
~Michael's Metal Pieces
~Offray Ribbon
~Studio G Glitter Glue
~Doily
~Heart Button
~Tim Holtz Vintage Photo Distress Ink
~Michael's Crochet Flower
~7 Gypies Beaded Flower
~Skeleton Leaves
~Homemade Shimmer Mist using FolkArt Metalic Paint in Pink Chiffon
Today I am so excited to share with you my first project made for Scraps of Color. The theme of this month's challenge that I chose was spring. I have so been looking forward to Spring as I know most of you have been. The warmer weather, the flowers blooming, the warmer weather. Yeah I really missed Spring.
Since new life marks the beginning of Spring I decided to give new life to some cards that I had lying around from years, yes years ago and turn them into a little mini album. When I first got back into paper crafts, and doing craft fairs, I made these note cards to sell at the shows. As many of them sold, sadly a bunch did not. This card set, that I named Lily at the time, was part of the bunch that returned home with me.
The covers of the mini are recycled chipboard that I covered with purple textured paper from Core-dinations. I added some antique lace (my favorite lace), a G45 keyhole, MFT flourishes, and a collection of Yellow, ivory, pink and purple roses. I accompanied the cluster with white and teal blue flat pearls. I also sprayed each rose with Lindy's spray.
I also used a Recollections key for the binding with some sheer yellow ribbon. I used a Colorbok vellum quote, "Beauty of Creation" as the title of the album. There is an eyelet behind the loop in the key that acts as part of the closure.
When you open the album you see the notecards and each envelope has a card that holds 3x5 photo(s) and or journaling. I haven't added my photos yet and I definitely don't want to cover up the paper so I plans on using either vellum or acetate to create a fold out mat to hold more pics.
I didn't adhere the binding strips all the way down so that additional photo mats and tags can slide underneath.
I think it is a very sweet album and a great way to recycle some old cards.
You should definitely check out Scraps of color some more fabulous ideas and creations. These ladies are so very talented!
I have been in such a mood to create birthday cards lately so this project was right on time. So when I saw that the challenge for Practical Scrappers was birthdays I was in heaven! This card is also going to be the start of my "birthday card" series.
So let me show you my card and then I'll tell you what I did.
First I started with an image. So I chose a Birthday Party image from Melonheadz Illustrating (I love her images) and I colored her up using Copic Markers. I had crystal glitter glue and gave her sparkly shoes, hat, and dress.
I also used the Deconstructing Jen sketch #125 but instead of using the sketch as a portrait sketch I turned it on it's side and used it as a landscape. I am really pleased with how the card came out.
I added some gray flat back pearls to the card just to give it that extra Umpf and then I embossed the Happy Birthday sentiment and that was all she made. Just as a suggestion you may wanna go over to the Practical Scrappers blog and check out he other fantastic cards cards the DT created. You can never have enough birthday cards.
So this is the first Happy Birthday card. I am not sure how many will be in this series but I'm having fun in the process.
Thank you all so much for stopping by and I will see you next time.
Boy has it been a super long time since I have blogged about anything. I have been creating though and I have some projects to share with you, but I am sorry for my absence.
Well I have been participating in some swaps lately over at My Scrap Room. I have been having such a ball making the projects for these swaps but I have also been completely exhausted these weeks and then I one of those weeks I got ill with the flu and another week I went home from work with fevers everyday. It was horrible. I am finally on the mend and ready to share with you what I have been up to.
So there you have it. Thank you all so much for stopping by and sharing your time! I will see you all in the next one.
Kelli
What I used...
~K&Company, Tim Coffey Fall Mat Pad
~Recollections Card stock
~Recollections Crochet flowers
~Recollections Metal Brads
~Recollections Flowers
~Studio G Metal Brads
~Studio G Glitter glue
~Dollar General Silk flowers, Leaves, and Raffia
~Dollar General doily
~Trico Flowers and leaves
~DCWV Burlap Paper
~Offray ribbon
~Fiskars Kaleidoscope border punch
~WOC Skeleton leaves
~MFT Mini tabs foursome die
On behalf of Practical Scrappers DT challenge I want to share with you a card that is simple to produce, can be used for any occasion, and the image can easily be changed to fit any occasion. This is a great idea for those upcoming holidays.
The sentiment says "You make my heart flutter." I don't remember you created the digital stamp but as soon as I find it I will let you all know. I stamped the butterflies using Kaiser Crafts' "Bonjour" stamp set that was gifted to me from Krafthead Kreations (thank you Sis).
Using kraft card stock I stamped the images White ColoBox pigment ink and then embossed the butterflies to create a background for my sentiment to sit on. I added some pink and white scallop ribbon and then finished the card by inking the edges. I also embossed the inside of the card as well. This is an A2 / 5.5x4.25 inch card base.
This is a simple and pretty card and lately I have been all about how simply I can make a card. I am running low on a lot of cards and as my schedule gets busier with school starting again, time seems to be a high priced commodity now-a-days as many of you know. So being able to make cards quickly and beautifully is what I can afford, time wise.
So there you have it. A simple yet pretty card that can be changed to fit any occasion.
Ok everybody, I am going to call it a night and allot more time to play tomorrow. I hoped this inspires you and be sure to check out Practical Scrappers for more ideas using stamps.
Kelli
What I used...
~Recollections Kraft card stock
~Kaiser Crafts "Bonjour" stamp set
~Color Box "Frost White" pigment ink
~Recollections "Snow" Signature opaque embossing powder
~Offray Pink and White sheer scalloped ribbon
~Fiskars corner punch
~Sentiment by
The project I am sharing with you today is a Practical Scrapper DT project. The challenge was ten different ways to use eyelets. I love to use eyelets to help with my closures. It keeps my ties/ribbons in place and reenforces the holes that I make in my projects. I made a 3x3 card holder that is perfect to hold cards when you need to something to accompany a gift.I find 3x3 are big enough to write something to the recipient with out taking away from the gift.
I made 5 cards and 5 envelopes to fit the cards and created the holder that the cards are place in. These cards holder (can also substitute cards for tags) are great thank you gift ideas, nice stocking stuffer ideas (Christmas is coming), perfect for co-workers, teachers, guests, you name. Everyone has a use for these cards.
A really quick project that can be mass produced. So there you have it. Thank you stopping by to see what new project I was working on and i pray you stop by again soon. So until next time...
Welcome!!! So my planned 1st Mini Album Monday has turned into a Mini Album Wednesday for this month. Hubs and I recently took in a foster child and it has been a rough couple of days. Plus, being super slammed at work led to no free time for other things.
Anywho, the mini that I have to share with you today is one that I am truly proud of. I have scoured the net and YouTube looking for a mini like this and I have found nothing. If any of you know of one please let me know. Today's Mini is a Paper Bag Baby Bottle mini Album. The tags are shaped as baby bottle and can hold a 4x6 photo. I am so so proud of this album!!! I love the way it turned out and I have plans to make more. It is so super quick and easy and is so much fun to make.
Let me show you what I did. ** WARNING - there are LOTS of pictures!**
This is the cover of the album. A cover photo can tuck behind the scroll. The scroll itself came from the Theresa Collins Sophisticated Cricut Cartridge .
The spine of the album
First pages and a sample of the tags that are present throughout the album.
Each paper bag hold tags that look like this one just with different paper.
Next two pages
Accordion style fold out photo page
Next two pages: the green page is a double slider page. Tab on the top pulls out for two photos and the tab on the side pulls out for two photos.
Small pocket to hold two tags from the paper collection.
Next two pages. The only thing with the second page is that I with I had gold photo corners that had white tabs instead of black. But with the photo in this spot you can't see the black.
Next two pages with an accordion style fold out photo mat and white photo corners.
I really wanted to make a baby album that looks just like a bottle and could stand and be displayed opposed to laying down. I used a total of 6 bags and a chipboard back cover. I will post a video on the album here and on YouTube so you can see it in real time (well sort of real time).
Anywho, here it is! The first Mini Album Monday (though it is Wednesday) project.
Thank You all so much for stopping by and I pray you enjoyed the latest creation and first mini album of the year. I pray you all are having a great day and I will see you all in the next one. Bye!!
What I used...
~Cricut Schoolbook Cartridge: Tags, Nipples, Pull Tabs
~Cricut Theresa Collins Sophisticated Cartridge: Flourishes
~Recollections Card Stock
~DCWV Paper Stack - The Preppy Princess
~Offray ribbon
~Skeleton leaves
~Buttons
~Lace
~Flat back pearls
~Mulberry roses
~Recollections flowers




 Posts
Posts


