Showing posts with label Cricut schoolbook cartridge. Show all posts

Monday, March 25, 2013

Etched Glass Birthday Gift

Hi Everyone,

I pray you all had a lovely weekend.  I sure did. I was able to craft with my dear Sister this weekend and Hubs and I had a "Pot Luck" birthday party on Saturday.  WHich brings me to the reason for this post.  In trying to figure out what to get the birthday girl, Hubs and I came to the idea that we would give her a set of etched glasses.  She just turned 27 and wanted to celebrate with family and friends for dinner and then dinner turned in a "Girls Night" with her closest friends.  So the gift was perfect!!!

Here are the pics.  My apologies if they are a little fuzzy I took them with my phone.


Each glass is etch with a saying in a different saying.  This one is the "Bottoms Up" glass.

The "Cheers" glass.

The "Salud" glass.

The "Yasas" glass.  This is my favorite probably because of the move "My Big Fat Greek Wedding".

Some more pics...


I also made the bod that you see in the first photo - I needed something to put them in and this way she can use the box again.  I used some chipboard, sticky tape, and a roll of paper from the Dollar Tree.

Super simple, quick gift.  OH, I used the Cricut Craft Room to shape the word in a circle and them cut the letters on vinyl with my Cricut and etch the words with the Armor Etching Creme.  Love that stuff.  I have had the big bottle for the last 4-5 yrs now and it is still going strong.  I love it because it does not take a lot of creme to etch an image.  One day I will do a video on how I etch glass using the creme and show how a little goes a LONG way.

And there you have it.

All right everybody, I'm out.  Thank you all so much for stopping by and I will see you left time.

:)  Kelli

What I used...

~Dollar Tree Vinyl/Contact Paper
~Dollar Tree Gift paper
~Dollar Tree Martini Glasses
~Armor Etch Creme
~Cricut Plantin SchoolBook Cartridge
~Cricut Craft Room
~Premium Saltine Chipboard box
~Recollections red sticky tape

Wednesday, January 30, 2013

The 1st Mini Album Monday Paper Bag Baby Bottle

Hi Everybody.

Welcome!!!  So my planned 1st Mini Album Monday has turned into a Mini Album Wednesday for this month.  Hubs and I recently took in a foster child and it has been a rough couple of days.  Plus, being super slammed at work led to no free time for other things.

Anywho, the mini that I have to share with you  today is one that I am truly proud of.  I have scoured the net and YouTube looking for a mini like this and I have found nothing.  If any of you know of one please let me know.  Today's Mini is a Paper Bag Baby Bottle mini Album.  The tags are shaped as baby bottle and can hold a 4x6 photo.  I am so so proud of this album!!!  I love the way it turned out and I have plans to make more.  It is so super quick and easy and is so much fun to make.

Let me show you what I did.  ** WARNING - there are LOTS of pictures!**

This is the cover of the album.  A cover photo can tuck behind the scroll.  The scroll itself came from the Theresa Collins Sophisticated Cricut Cartridge .


The spine of the album

First pages and a sample of the tags that are present throughout the album.


Each paper bag hold tags that look like this one just with different paper.

Next two pages

Accordion style fold out photo page


Next two pages: the green page is a double slider page. Tab on the top pulls out for two photos and the tab on the side pulls out for two photos.

Small pocket to hold two tags from the paper collection.

Next two pages. The only thing with the second page is that I with I had gold photo corners that had white tabs instead of black. But with the photo in this spot you can't see the black.

Next two pages with an accordion style fold out photo mat and white photo corners.


Last page and back cover of album.

Watch the Video on Youtube


I really wanted to make a baby album that looks just like a bottle and could stand and be displayed opposed to laying down.  I used a total of 6 bags and a chipboard back cover. I will post a video on the album here and on YouTube so you can see it in real time (well sort of real time).

Anywho, here it is!  The first Mini Album Monday (though it is Wednesday) project.

Thank You all so much for stopping by and I pray you enjoyed the latest creation and first mini album of the year.  I pray you all are having a great day and I will see you all in the next one.  Bye!!

What I used...
~Cricut Schoolbook Cartridge: Tags, Nipples, Pull Tabs
~Cricut Theresa Collins Sophisticated Cartridge: Flourishes
~Recollections Card Stock
~DCWV Paper Stack - The Preppy Princess
~Offray ribbon
~Skeleton leaves
~Buttons
~Lace
~Flat back pearls
~Mulberry roses
~Recollections flowers

Saturday, November 24, 2012

Yellow and Gray Envelope/Pocket Mini Album

Hi Everyone,

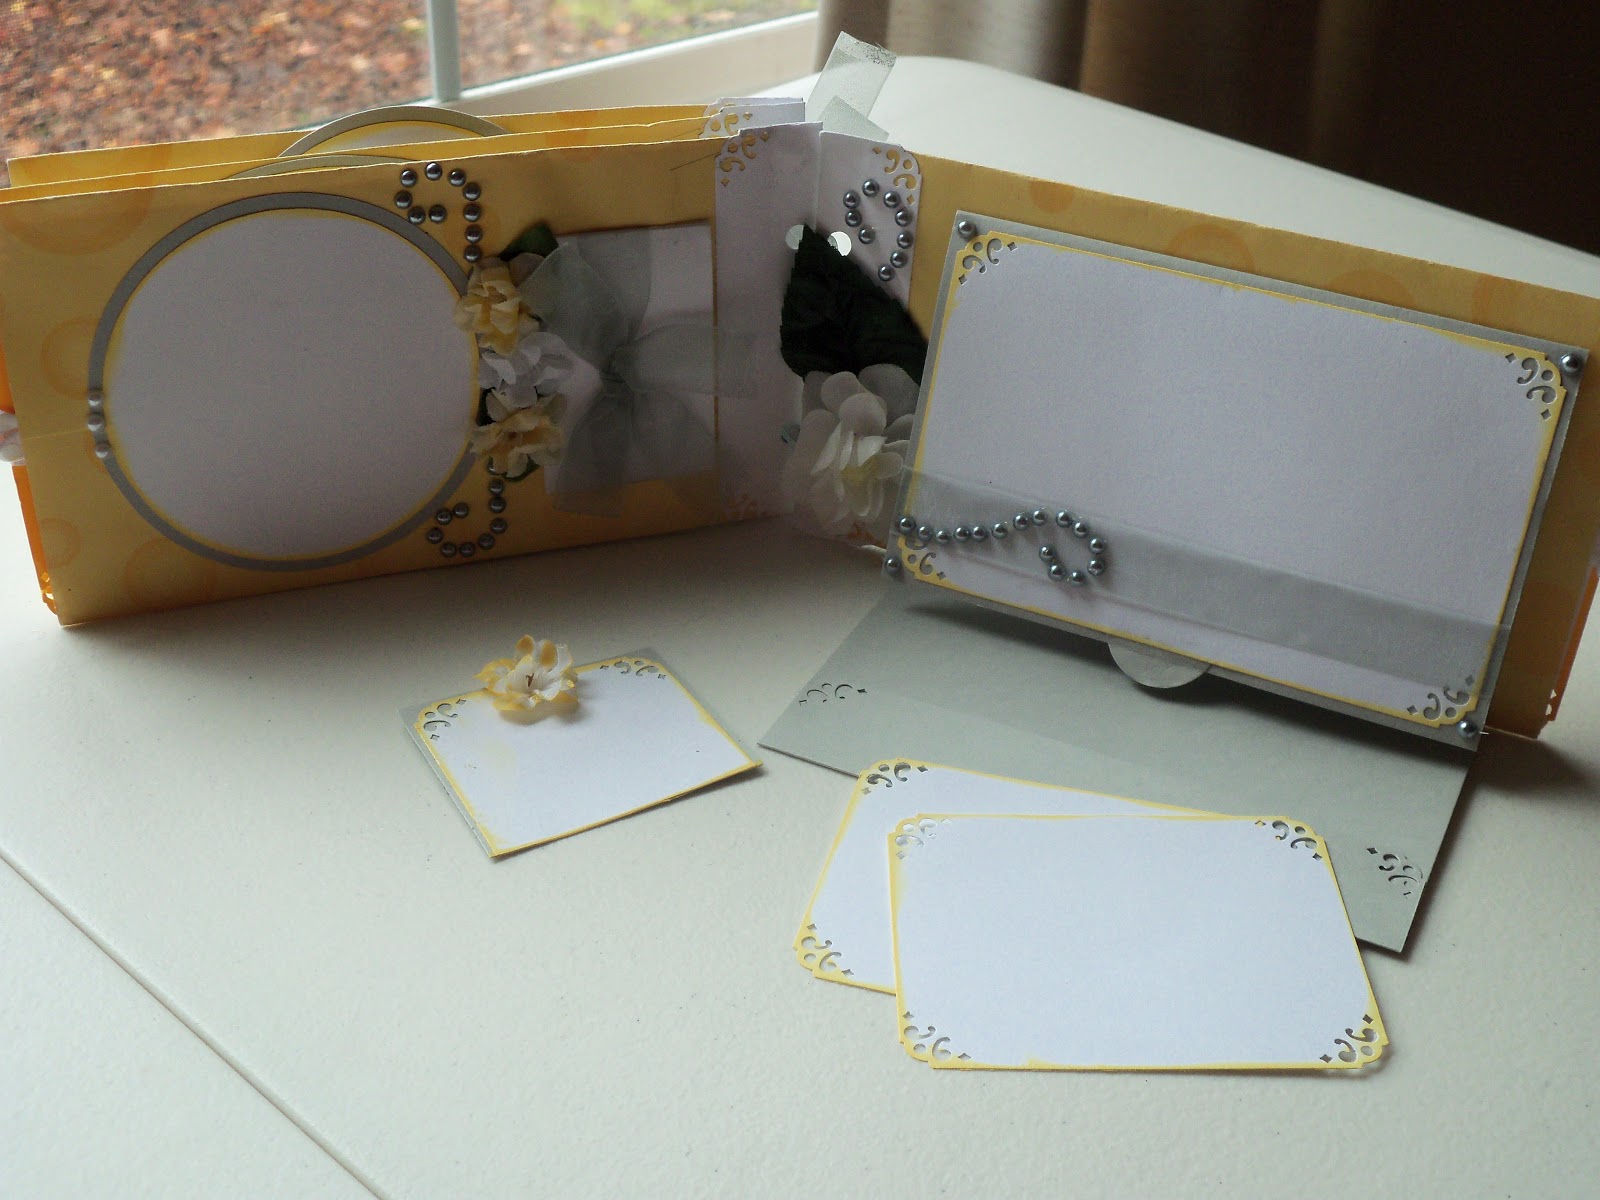
So this post is a way to recycle the old into something new.  While Hubs and I were living in PA we were involved with craft shows/bazzars.  One item that I created to sell were Envelope cards that can be placed on gifts, used for money cards, etc.  Well I made tons of them and most of them sold but I still have a dozen or so left that did not.  So instead of throwing them away I chose to make a mini album out of them.  These minis can easily hold full 3x5 photos.  This is one of my favorite albums mostly because it is my favorite color, yellow.  Here it is...


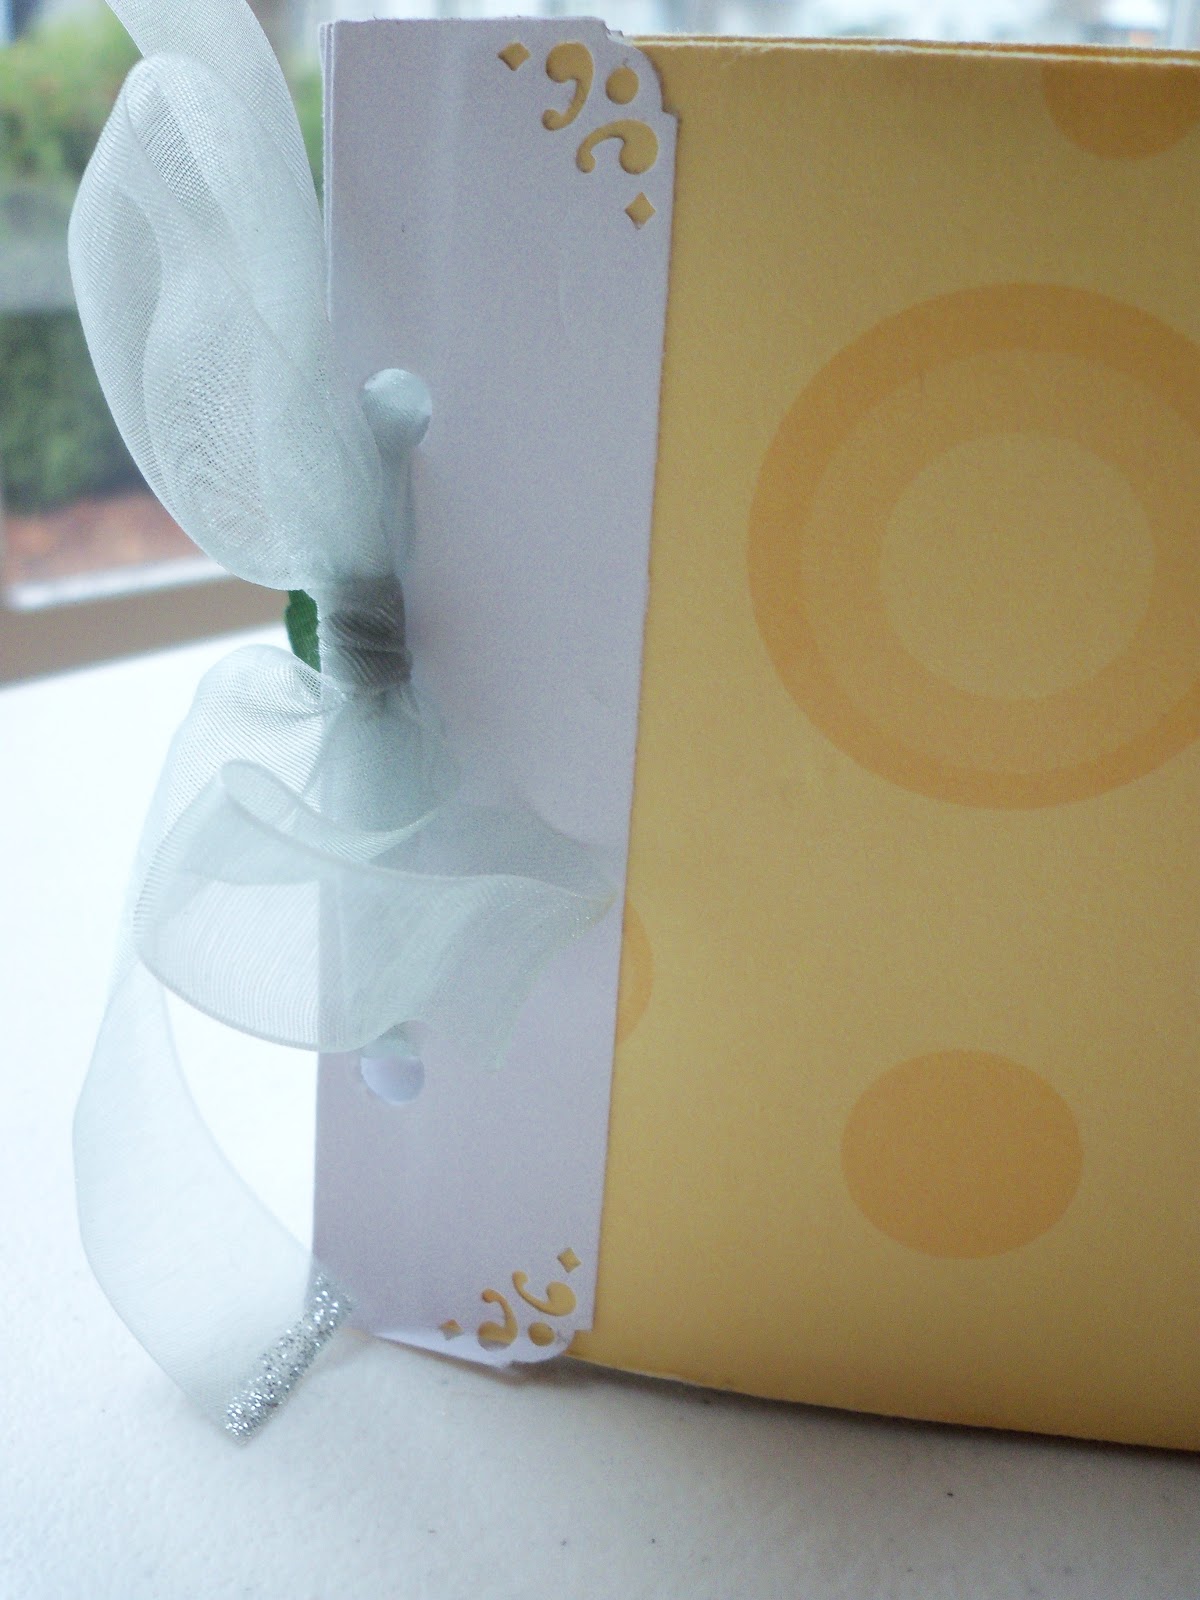
I used a sheer gray ribbon for the binding and then used Deco Art Twinkles on the ends to stop the fraying.

Pages one and two and a sample of what all the tags throughout the album look like.


A tag tucked behind the fold out photomat.


Pages three /\ and four \/

Tags for pages 3 and 4.


Pages five /\ and six \/

Tag from page 5 and a fold out photomat with a pocket for tags.

So here is my work in progress.  I did make a video of this album.  You can see it here: 


Well everyone, that is all for now.  You know I am so grateful to be able to share these projects with you all and I am so thankful for each one of you!!  Thank you all for watching and I will see you in the next one...

Kelli

What I used...
~DecoArt Twinkles
~Silk Flowers
~Flat back pearls
~Doilies
~Recollections Card Stock
~Fiskars corner punch
~Autumn Leaves journal stamps
~Sheer gray ribbon
~Colorbox pigment ink
~Offray ribbon


Wednesday, November 21, 2012

Sympathy Card

Hi Everybody

Just a quick post of a card I made for my dear Sister whose Father passed away. I pray she doesn't mind me sharing this card.  As a matter of fact I debated with myself over whether or not I should post this card but after persistent encouraging from Hubs I am posting it.  I am quite proud of this card and I adore the way it came out.  I wanted everything be just perfect for this card.  So here it is...


I am not going to say to much about the card other than a lot of love went into this card and I pray she and the family feel the love Hubs and I have for them when they look at the card.  {Sis, Hubs and I are so sorry for your Dad's passing and ya'll have been and will continue to be in our prayers}.

So here it is.  And yes, I know it has been some time since I posted but lots of life has gotten in the way and way too much drama from those around me, plus lots of helping people move - including myself.  A trip across country, a missionary journey, and rehearsals for a concert, just to name a few, have been my distraction over the last few months.  I have been working on Christmas projects and I will prayerfully be posting videos, yes videos, on these projects over the (USA) Thanksgiving Holiday 2012 and posting them on YouTube.  I will link the videos to the blogs as well. 

Alright everyone.  That's all for now.  Thank you all so much for stopping by and I will see you in the next blog.

Oh... If you have any questions about ANYTHING please let me know.

Thanks a bunch!!

Kelli

What I used...

~Recollections card stock
~DCWV Paper Collection
~Red mulberry roses 
~Cricut Schoolbook cartridge (for the circle shape)
~Sympathy Sentiment by
~Eva digital image by
~Black flatback rhinestones

Tuesday, June 26, 2012

Bath Time Fun, Masculine 8x8 Album part 1

Hi Everyone,

I pray everyone is doing well.  I wanted to share a project that is ongoing.  A friend of Hubs and I has a  plethora of photos that are just lying around and need to be organized and preserved.  So this is part one of the album.  As I scrap the photos I will post them for all to share in.

So here is the album and the first 5 pages.  I made the album from the chip board from the loosefeaf tablet.  The ones that look like the yellow legal pads.  Anywho, I asked hubs if this the material was too feminine and he said no suit is "Hubs Approved".  This was great for me since I have plenty of it and the recipients favorite colors are brown, blue and ivory.


There is a thick layer of batting under the fabric to make it nice and plush.  I added this Coverall/Overall fastener as the closure for the album and some ivory elastic.


And here are the photos that have been scrapped so far for the album.  I found I had the hardest time with the first picture and now looking at it I can see so much more that I can do with it so I am gonna go back and revamp the first one and add some more embellishment to the last two.


I find Masculine genre so difficult to do but I think I am starting to get into the zone for it.

So here it is, the project so far.  I have lots more to do so stayed tuned.

I will see you all in the next one and thanks for stopping by.   Later!!

Kelli

Wednesday, April 18, 2012

Bunny Card Series #3

Hi Everybody!

So, I know it has been long overdue but I have another card for you.  You want to know what my struggle has been during this series; finding adorable bunnies stamps to use.  I have been to my local craft stores and didn't see too much there and then I realized I want to showcase some artist that you might not be familiar with that I think have the Cutest stamps.  So every card in this series has and will feature digital stamps from various artists.

Today's card comes from Stampfairy and features the Bunny1 stamp.  You can download the stamp here.  And here is my card using this adorable stamp.


Isn't this such a sweet bunny?!  I am in love with him.  I really tried to keep this card simple and not go too crazy by adding the flowers, bling and other embellies.  I think it is simple and sweet.  So, this is card #3; stay tuned for card #4.

Thanks for stopping by everybody and thank you for all your comments.  I SO appreciate you taking the time to share your thoughts and love.  I included links to all the products I used (well the ones I could find).

Until the next time..

Tootles,
Kelli

What I used..
~We R Memory Keepers, 6x6 Cotton Tail paper pad
~Stamp Fairy digital stamp
~DecoArt Crystal Twinkles
~Recollections card stock
~Memento Tuxedo, black ink
~Studio G stamps
~1/8 Satin Ribbon


I have connected link to where you can find these products but these are in no way the cheapest prices. If you would like me to link where I purchased these items from let me know.

Friday, May 13, 2011

Butterfly Mini Album using the Cricut Cartridge "Plantin Schoolbook"

Hello All You Creative Geniuses,

Everywhere I turn lately I see butterflies; and not just because it is Spring.  :)  In paper collections, embellishments, in videos, everywhere.  So in celebrating the loveliness of Spring and keeping in line with the butterfly theme, I decided that I would make a Butterfly Mini Album.  Now this album may be a little different than what you have seen so far.  To make this album I will use the Cricut Expression and the Plantin Schoolbook cartridge.  You're probably wondering how I am going to pull that one off since there are no butterflies on that cartridge.  Well for my next trick or blog (meaning this one) I will attempt to make a Butterfly Mini Album using recycled chipboard and the Cricut Plantin Schoolbook font cartridge.  Now, onto Step One

Step 1:
   Chipboard is everywhere around us.  From cereal boxes, to USPS mailing envelopes, to the back of a loose leaf tablet; all we have to do is look.  So start with some chipboard.  You can buy if you need to.  I am going to recycle this cereal box of Honey Nut Cheerios.  Cut the box apart on each and every fold.


Step 2:
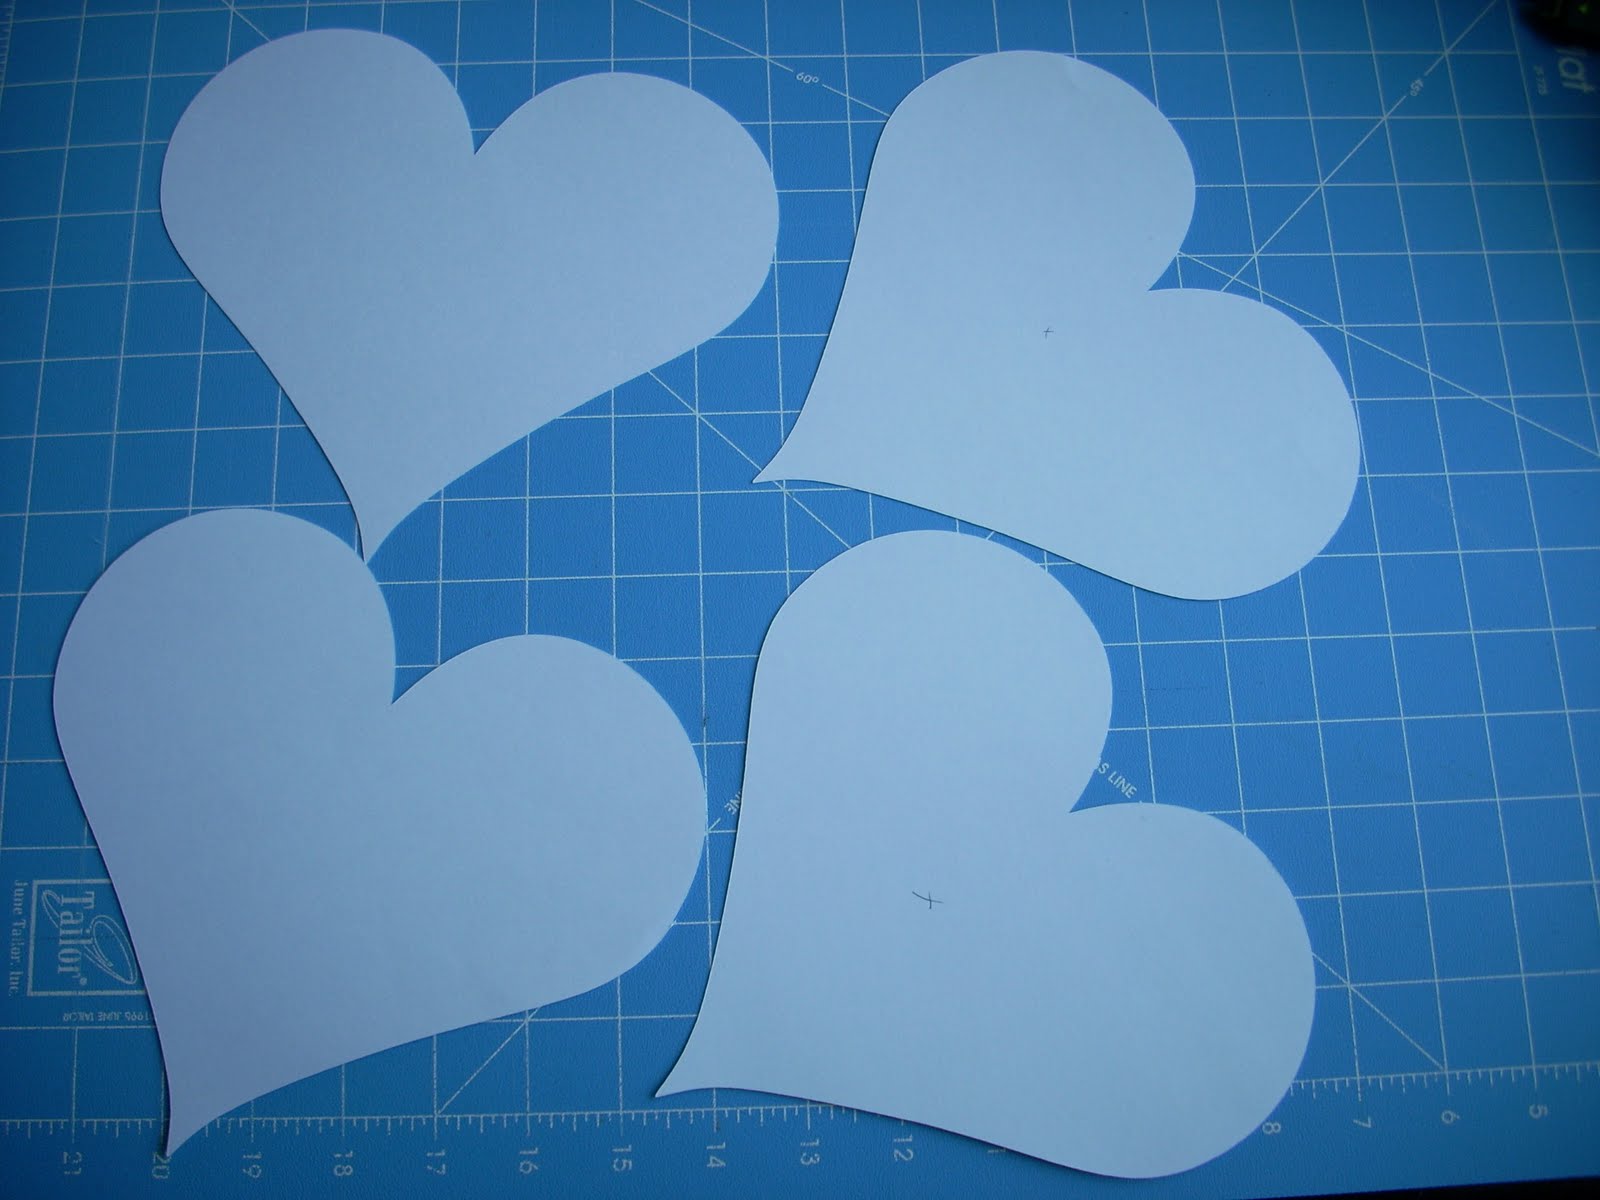
   The length of your box (left-right) will determine the largest size image you can cut.  The box I used is 7 1/2" so I will cut my image at a size of 7".  Cricut time!  Place your Cricut size on 7", your pressure on max, your speed on high, make sure the Plantin school cartridge is inserted, and then press the HEART button and cut.  Yes, I said the heart button.  This heart will create your butterfly.  You will need to cut this multiple times.  I recommend cutting this image 4 times.           
   Once cut, you will need to cut the heart image again on the second panel but this time use the flip image.  The flip is so that the hearts, when back to back, line up nicely.  Make sure to mark which image is the flipped image.  The flipped one will be your back cover.  


Repeat this process for the inside pages.  You can make as many pages as you desire.  If you don't have extra chipboard then you can cut hearts out of card stock and glue them together.  For my butterfly I cut out 4 pages or 8 hearts with my Cricut using card stock.  (Hey, there's only two of us in the house right now and we can't eat cereal that fast).  Then I glued one of the regular cut hearts and a flipped heart together


   When we were kids, one of the first images that we learned to draw was butterfly because it was so easy to do.  Well, at least I did.  I remembered that making a butterfly was as easy as drawing two '3's side-by-side; this gave you the wings.  And then I remembered that to make a heart you use a '3' and a 'V'.  So I added two and two and I got a butterfly.  
Step 3:
   Now measure and cut 2 inches off from the bottom point going to the top of the heart.  This is where the shape of the butterfly really starts to take form.  Repeat this process with each page you created. 


Step 4:
   Cut your holes for binding.  If you are using binder rings then this is the point where you would want to punch your holes; this way when you cover the heart/butterfly wing with paper you know where to re-punch the holes.  If you are using another binding method then you may want to skip this part.

Step 5:
   Now is the time to cut all the patterned paper for your inside pages and covers.  I decided to use a designer stack that I have had for awhile.  So, I chose the "Jolie Chocolat" 8x8 paper stack by S.E.I.  I think this paper is just perfect for a butterfly.  Assemble your patterned/designer paper and glue them to each of your hearts.  Don't forget to mark which pieces are the flipped cuts.  You will probably want to adjust your cricut settings since you are not cutting the chipboard any more.


Step 6:
   Now, all that is left to do is to embellish, create your tags and add your pics.  At this point my album is pretty much done minus the photos but I still have a few more embellishments and tags to create.  But I will show you what I have done thus far.  Feel free to leave comments and let me know what you think. 

This is the cover...


Inside cover on the left and page 2 on the right with two tags...


Page 3 has a butterfly insert with a little mini album hiding inside the butterfly...


Page 4 has a circle photo-mat with journaling on the back and a huge floral cut out with room for more journaling.
 

Pages 5 and 6 have pockets with loads of tags...


Page 7 and inside of the back cover...


This is just a quick view of the album as it stands right now.  When I finish the album completely I will do a video and show you all.  We just got a new camera so prayerfully the video will come out nice and clear.

***Update:  So I have created a new album that was Published in the July, 2013 edition of Cricut magazine.  Here is the link to see the photos: http://favor8favors.blogspot.com/2013/10/ive-been-published.html


So until later everybody.  Thank you for sharing some time with me.

Kelli
Favorite Favors

"Lord, I open my heart. Fill it with nothing but You.  I open my heart, as the old gives way to the new.  Lord, cleanse me with, Your holy fire, until all that remains is earnest desire.  To open my heart and be filled, with nothing but You."  ~sung by Nicole Binion on album the "When Women Worship" by Mary Alessi & Friends