Showing posts with label mini scrapbook album. Show all posts

Thursday, November 27, 2014

SOC Altered Picture Frame Mini Album and Our Love Bug Introduction

Hi Everyone,

So with today being Thanksgiving I thought I would share with you a very special SOC project. This one is dear to me because it reminds me how truly blessed I am.  I was diagnosed with PCOS a long time ago and was told that I wouldn't be able to get pregnant naturally. That I would need medical assistance if I ever want children.  Last Thanksgiving I found out that I was pregnant.  This Thanksgiving she is four (4) months young, beautiful and healthy; Praise God!!

Some months ago I went to perusing my local Michael's and saw this really pretty picture frame and instantly had a great idea to take the frame and make a mini album out of it, so I picked up a couple of frames.  I started this project and then I put it down again.  Not sure if it was the tiredness from pregnancy or the fussy cutting, or maybe it was a combination of the two. Whatever it was, I walked away from the project.

Then I gave birth to our beautiful baby girl and crafting came to a near standstill.  A few weeks ago I picked the project back up and was inspired once again and this time I finished it.

I love, love, love how this came out!!  Oh, and introducing the star in this album, our Lil' Love Bug, Rebekah...


Up close and personal...


The back of the album...

Just pull the ribbon to open the album...


 I might go back and spritz the flowers with a little Lindy's but otherwise I really like it. I have this frame hanging up at work on my cubicle/desk wall.  I attached black card stock to the frame and turned it into an accordion mini album.  I admit the 2x3 pics are a little dark because I printed them on the printer at work and couldn't adjust the settings, but I am going to print them through Walmart or Snapfish and then put them in.

There are many different options to choose for a hanging or put a stand on the back, but I chose the ribbon.

This project came out so well I can't wait to do it again.  So there you  have it.

I have never known such bliss as much as being a Mom.  I am truly blessed!!  Thanksgiving is so much more meaningful this year.

Happy Thanksgiving to you and your family!!

Kelli


What I used…
~Michael's $1.50 bin frame
~G45 Ladies Diary 6x6 pad
~Recollections Black Card Stock
~Ranger Black dabber paint
~Butterfly Punches
~Glossy Accents
~Straight pins
~Acrylic Beads
~Studio G Flat Back Pearls
~Trico Roses in Peach
~Recollections Roses in Ivory

Thursday, October 16, 2014

September Project: Bushels of Love Apple Mini Album


Hi Everybody,

September marks a couple of fun days for me. First there is the 8 which is my anniversary. We are celebrating 7 yrs. The 17 is National Apple Dumpling Day, and the 26 Johnny Appleseed Day.  Then, 

With autumn approaching I find myself thinking about apples. Apple picking, apple cider, baking apple pies; all these things remind me of the wonderful memories with my loved ones. And sadly, I realize, I have no pictures of my loved ones at work, a crime I know. But I a great way to show them off, especially since we have a wonderful little bushel of Love to add to the family, was to create a little mini for their photos. Something small enough to stand on my desk but big enough to show their faces. So using the Sliced Apple file by Miss Kate Cuttables, I made an accordion style mini. This is such a cute mini, just big enough to keep the apples of my eye close to me. 


I cut the apple base (brown cardstock) out three times and the apple (red and cream cardstock) out six times for the front and back of the apple.
Then I cut two hinges at 2.5x1”, folded in half and adhered them to the base apple. The hinge corners did stick out so I cut them along the curve of the apple.
Lastly I inked the edges of all the cardstock and glued everything together.


And there you have it. A quick mini that is worthy to stand on my desk at work. Oh, and the apples really do stand up on their own. I kept my mini really simple but you could make your bunch of apples as colorful and elaborate as you like. 

Now I have just one question to ask you all, does anyone have any great Apple Dumpling recipes? All these apples have got me feeling hungry.

Kelli

National Accordion (Mini Album) Awareness Month


Hi All,

So as I was going through the list of holidays for the month of June I found out that June is National Accordion Awareness month.  Now believe it or not I actually do like the sound of an accordion.  I don't know any famous players but I do have a healthy respect and appreciation for the instrument.

I also found out that June is the awareness month for a lot of disabilities and diseases that inhibit the quality of life that someone may have.

So I combined the the two causes and created a "Live Each Day" accordion mini album.


I chose to use some paper I had in my stash for way to long, Making Memories 5th Avenue Collection and 6.5x5.75 envelopes to create this project.

I hope this project inspires you to either Pick up the accordion, Live life to the fullest, or if nothing else, use your stash up.

Until next time everybody...

Kelli

Wednesday, May 14, 2014

Hello Card

Hi everybody,

So do you remember when I did the Prima Lyric Mini Album for a swap with a talented young lady in Sweden, well I made a card to accompany the package and i forgot to post it.  So when she shared the card on the FB group I grabbed up the photo and cropped it so that I could share it with you all. Then I asked the recipient if she could take a photo for me and she did and sent it and here is her photo. This one is better because you can click on the image and it expands.


It's a simple A2 (4.25x5.5) size card and I used the Mariposa Paper collection from DCWV and created this card. I used a variety of embellies on this card and i do love the way it came out.

I layered some lace, that I purchased at a local store here in OR on top of each other and I added some Recollections pink paper roses, silk white rolled roses from Trico, and flowers from my stash along with Studio 112 flat back pearls, Bridal pearl brad, and a crocheted Recollections flower.  Some stamens finish off the cluster and all this sits on a few Recollections leaves.  I added two wooden butterflies that I sprayed with homemade glitter mist (Pink Chiffon-Folk Art paint) and inked the edges with Vintage Photo distress ink.  I also used DecoArt gold Twinkles as the body of the big butterfly and some tiny pearls for the body of the little butterfly.  And lastly, using the Vintage Photo, I stamped Hello from  Stamp cluster from Michael's $1.50 bin.

And there you have a simple card to accompany the mini.

Just wanted to share this will you all, and I will see you all next time.

Kelli


If you missed the mini album you can click here to see it.  :D


Tuesday, April 29, 2014

Scraps of Color Dates to Remember Mini Organizer Project


Hi Everybody,

Lately I have been in a mode of finishing up projects I have started some time ago, not starting new ones - if I can help it, and getting things organized.  My Dad used to say, "Have a place for everything and everything in its place."  His words keep ringing in my head.  Maybe i'm entering into the nesting stage of my pregnancy.  

Whatever the reason, I also found out that April is also Records and Information Management Month. Which fits my "nesting" so I created a little mini to keep important dates together in one place.  Birthdays, Anniversaries, etc.


First page

Second and third pages

2nd page photo area

Page six and inside back cover

Page six photo area

Here is a quick video of the album in its entirity or watch on YouTube here.


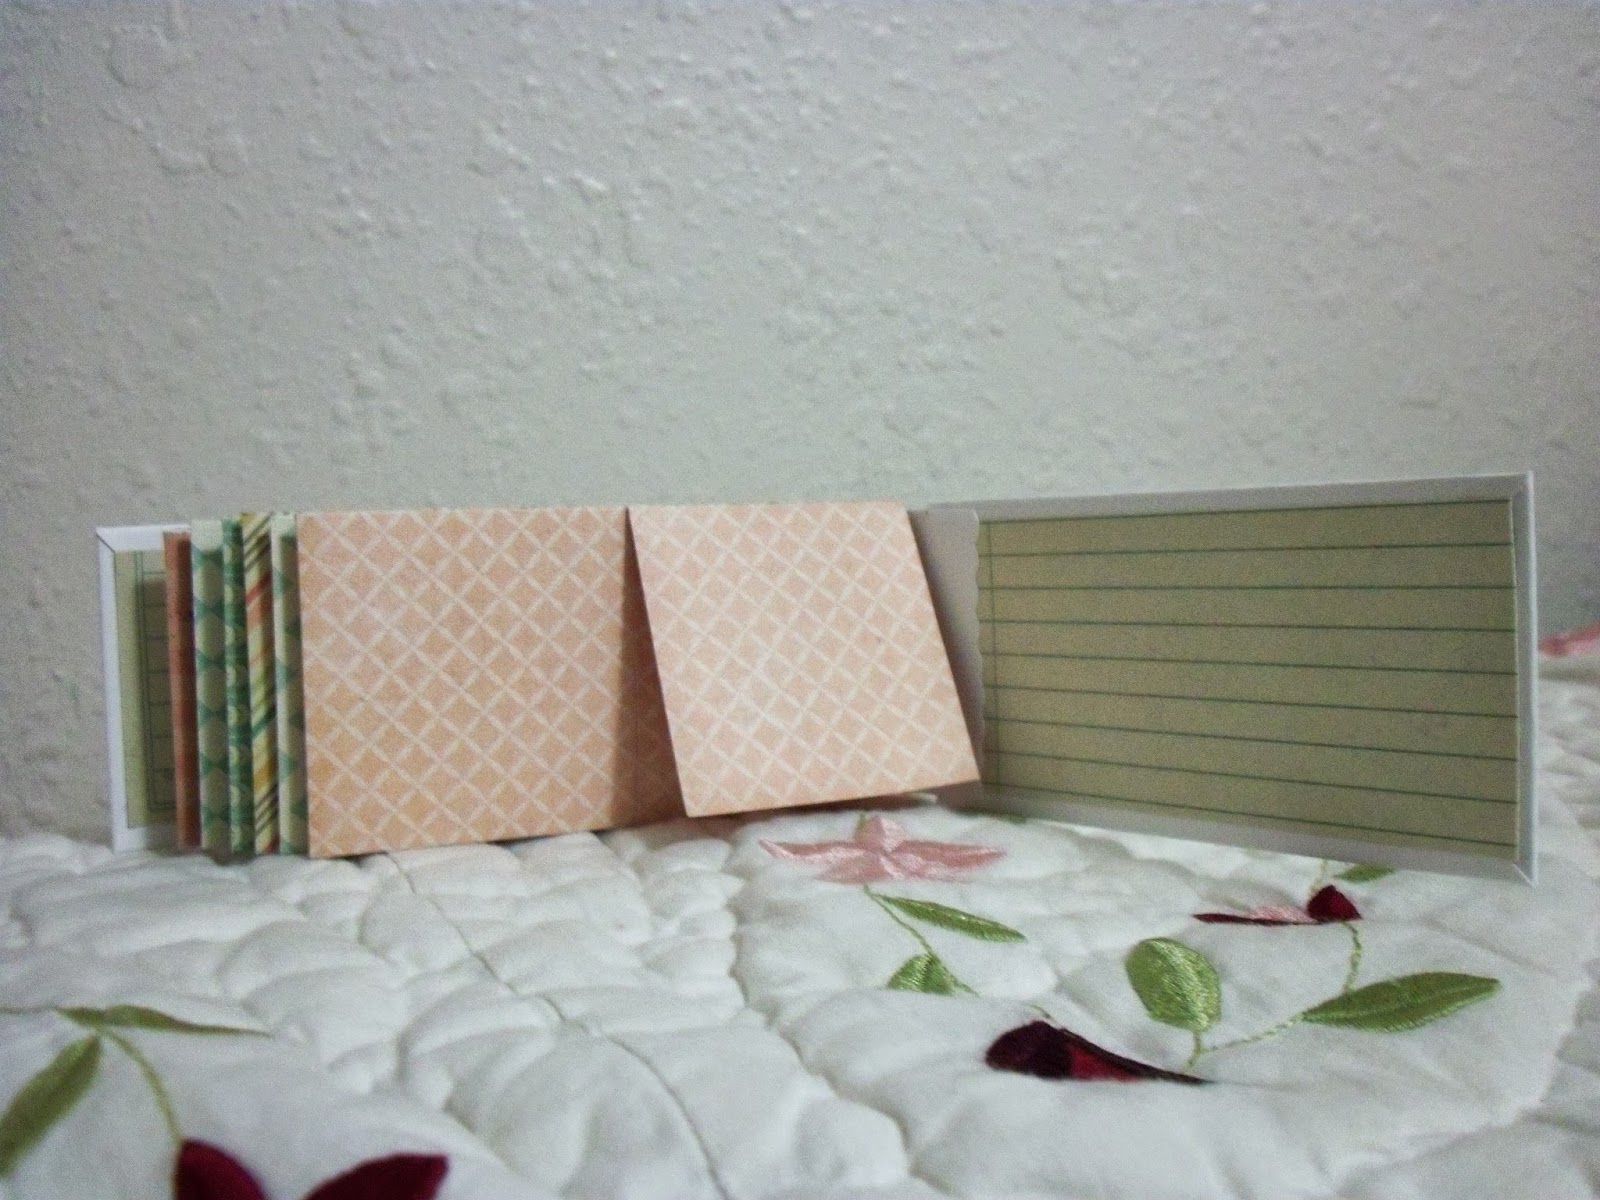
I didn't takes pictures of each page but they are all constructed the same and created the pages of the mini using sheets from the 6x6 MME Nostalgia pad.  I folded a 6x6 page to create two pockets and a 2x2 foldout photo area on the back.  I used the lined journal paper on the front and back inside covers for more room to either write or cover with a photo.  

Then I assembled it together with hinges and decorated the front and I was done.  This was such a fun, quick, and easy mini organizer to create. And now all I have to do is fill it with important dates to remember. 

That's all for today everybody.  Thank you for spending time to see my project and I will see you all next time.

Bye

Kelli

Sunday, April 13, 2014

Artful Mail Groupies Mini Album Swap

Hi Everybody,

Just sharing the mini album I made for swap at Artful Mail Groupies on Facebook.  Because I had to mail this off internationally and was in a bit of a rush to make the PO, I forgot to take up-close pictures but I did manage to pull together this video of the album.

To watch Directly on YouTube click here

I cut my bags in half and trimmed them down so that from one bag I have two 4.25" x 4.75" pieces.

Tags:
My large photo mats were cut at 4.25" x 4 5/8"
Designer paper was cut at 4" x 4 3/8"
Small tags cut at 2.75" x 4 5/8"
Small tag designer paper 2.75" x 4.5"

Binding:
I used a method similar to the "hidden hinge" method by Kathy Orta

Cover:
Recycled Chipboard cut at 4.75 x 5"

What I used..
~Black Celebrate It Bags
~Recollections Black Card stock
~Prima Lyric Paper Collection
~Trico Flowers and Leaves
~Recollections flowers
~Bridal Pearl Brads
~Bridal Stamens
~Studio G Pearls
~Michael's Metal Pieces
~Offray Ribbon
~Studio G Glitter Glue
~Doily
~Heart Button
~Tim Holtz Vintage Photo Distress Ink
~Michael's Crochet Flower
~7 Gypies Beaded Flower
~Skeleton Leaves
~Homemade Shimmer Mist using FolkArt Metalic Paint in Pink Chiffon

Thursday, March 27, 2014

Scraps of Color (SOC) Design Project Mini Album

Hi Everybody

 Today I am so excited to share with you my first project made for Scraps of Color. The theme of this month's challenge that I chose was spring.  I have so been looking forward to Spring as I know most of you have been. The warmer weather, the flowers blooming, the warmer weather. Yeah I really missed Spring.

Since new life marks the beginning of Spring I decided to give new life to some cards that I had lying around from years, yes years ago and turn them into a little mini album.  When I first got back into paper crafts, and doing craft fairs, I made these note cards to sell at the shows.  As many of them sold, sadly a bunch did not.  This card set, that I named Lily at the time, was part of the bunch that returned home with me.
The covers of the mini are recycled chipboard that I covered with purple textured paper from         Core-dinations. I added some antique lace (my favorite lace), a G45 keyhole, MFT flourishes, and a collection of Yellow, ivory, pink and purple roses.  I accompanied the cluster with white and teal blue flat pearls. I also sprayed each rose with Lindy's spray.


I also used a Recollections key for the binding with some sheer yellow ribbon.  I used a Colorbok vellum quote, "Beauty of Creation" as the title of the album. There is an eyelet behind the loop in the key that acts as part of the closure. 


When you open the album you see the notecards and each envelope has a card that holds 3x5 photo(s) and or journaling.  I haven't added my photos yet and I definitely don't want to cover up the paper so I plans on using either vellum or acetate to create a fold out mat to hold more pics. 


I didn't adhere the binding strips all the way down so that additional photo mats and tags can slide underneath.


 I think it is a very sweet album and a great way to recycle some old cards. 

 You should definitely check out Scraps of color some more fabulous ideas and creations. These ladies are so very talented!

That's all for today.  See you all next time.

Kelli


What I used...
Recollections Metal Key
G45 Ornate Metal Keyhole
Colorbok Vellum Quote
Fiskars Kaleidoscpe punch
Antique Lace
Flatback Pearls
Offray Ribbon
Lindy's Stamp Gang - Clam Bake Beige

Friday, November 29, 2013

Tea & Tags Swap 2013 at My Scrap Room

Hi Everybody!

Happy Thanksgiving!!

Boy has it been a super long time since I have blogged about anything.  I have been creating though and I have some projects to share with you, but I am sorry for my absence.

Well I have been participating in some swaps lately over at My Scrap Room.  I have been having such a ball making the projects for these swaps but I have also been completely exhausted these weeks and then I one of those weeks I got ill with the flu and another week I went home from work with fevers everyday.  It was horrible.  I am finally on the mend and ready to share with you what I have been up to.


To see the video of this album click here...


So there you have it. Thank you all so much for stopping by and sharing your time!  I will see you all in the next one.

Kelli

What I used...
~K&Company, Tim Coffey Fall Mat Pad
~Recollections Card stock
~Recollections Crochet flowers
~Recollections Metal Brads
~Recollections Flowers
~Studio G Metal Brads
~Studio G Glitter glue
~Dollar General Silk flowers, Leaves, and Raffia
~Dollar General doily
~Trico Flowers and leaves
~DCWV Burlap Paper
~Offray ribbon
~Fiskars Kaleidoscope border punch
~WOC Skeleton leaves
~MFT Mini tabs foursome die

Monday, October 21, 2013

Practical Scrappers DT Project - Game Time


Hi Everybody,

I am sharing with you all a Practical Scrappers DT project for October.

Nothing Says Fall to me like Football.  The scent in the air, the feel the stitching on the pigskin, the yelling at the refs and coaches about the STUPID plays and calls.  I love it all!

I can remember being a lil girl and playing football with my youngest brother, David, (18 months younger) and his friends.  Ah, the good ol' days.  Those games quickly came to an end when I started to "develop" and all my brother's friends wanted to "cover" me.  I was immediately told by Dave, "You can't play with us anymore," and just like that, my football career was over.

I still enjoy watching a good game.  Doesn't even matter who is playing I just enjoy the game itself.  When Hubs and I moved to OR we moved to a college town and were instantly told by friends and close family that we are Ducks, University of Oregon.  And that we are not to fall prey to the Oregon State Beavers.  In time we found out why.  The Ducks really are the better team having won more games and trophies, and having better uniforms and jerseys.  Just look at the record and out fashion sense. Anywho we have grown to love our ducks.

In 2011, when we moved, we were invited to a Duck party and I was able to snap some pics of family and friends watching the game, eating, and having a great time.  After two years I found the perfect way to scrap these photos.  I created a U of O football album to place all those memories.  Here are just a few shots of the album and one of my favorite spreads.


I used an SVG Cuts of a football frame to make this album and cut the pieces out with my Gazelle.  I bound the whole thing together using my BIA.  I really like the way it came out.  This is a super easy album to make even if you don't have an electric cutter. You can always cut out the football shape, stripes and stitching by hand. Just find a pic of a football that you like, print it and cut away.

I also went online and found some UofO logos that I like along with our mascot.  I printed them out and fussy cut them for the pages.  The only thing left is to have more parties to be able to make more football albums.  Well gotta go.  It's Game Time!!

Kelli


Thanks for stopping by you guys and Go Ducks!!


What I used
~Cereal box chipboard
~Deco Art Gold Twinkles
~Studio G glitter glue - iridescent and green
~Studio G glitter paper - yellow and green
~Studio G pigment ink - yellow and green
~Doilies
~Mulberry flowers

Wednesday, October 2, 2013

I'VE BEEN PUBLISHED!

Hi Everyone,

I am so  super stoked, overjoyed, and completely happy to share this news with you. I have been sitting on it for awhile and I finally can share it!

I submitted a newer version of my butterfly mini album made from the Cricut Schoolbook cartridge to Northridge Publishing, they handle the Cricut magazine, and they accepted it for the July issue of the Magazine.


Here is the link to the first Butterfly Mini album I created and a tutorial on how I did it.

Anywho Here a snapshot of the two page spread from the July 2013 issue.


I LOVE THIS ALBUM!!! I have been wanting to share it with you for a long time now.  It seems like forever.

Here are some up close shots of each individual page that I took in the Post Office before I mailed it off.  I was in a rush to get it out on time that I forgot to take pics of the album.  I wound up opening up the package and taking these shots with my hubby's camera phone.


This 2-page spread can hold up to 4 photos/journaling spot. There is a folder spot on the right where 3 photos can be added.  The doilies were part of a RAK from my bestie Krafthead Kreations.  Thanks Sis!!

This spread has two pockets overlapping on each page and inside the pockets there are acetate tags for more photos or journaling.  This spread can hold 10 photos/journaling spot.

This spread had acetate pockets with a tag.  Holds up to 6 photos/journaling spot.

This spread is great for journaling right on the upper left side and the rose is connected to a tag for journaling.  And then I created a pocket on the right side with the fussy-cut roses.  Another folder spot that can hold 4 photos/journaling spot.

This is one of my favorite pages!! Both pages have folders that open up for photos/journaling spots, and ont he right side there is an additional tag behind the folder.  The left side is held shut with the baker's twine and the right side is held shut by tucking the corner under the roses.

This page I opted not to add any photo mats to because I loved the paper and thought it would a great 2-page spread just for journaling.

With all the beauty on the front and within this album I decide to leave the back blank.

I did a lot of fussy cutting on this album and it was soooo worth it!  I am over the moon with joy that I have been published.  I would never have guessed I would be published.  I think we may have to do another giveaway and share the love. Speaking of which, we reached 50+ fabulous followers so we are indeed having a giveaway for reaching this goal. 

 I want to thank you all for all your support through the years!  I could not have done it without you all!! <3 p="">

Thank you all for stopping by and I will see you in a little bit.

~Kelli


What I used...
~Colorbok Rosewood Paper Collection
~Vintage Photo Distress ink
~Dress it up buttons,
~Trico mulberry roses
~Prima wooden clocks
~Studio G flatback pearls
~Studio 112 stamps
~Studio 112 Vellum quotes
~4mm flatback pearls from ebay
~Glossy accents
~Recollections crocheted flowers
~Recollections Card stock
~Skeleton Leaves
~Vintage laces
~Twinery baker's twine
~Autumn Leaves Journaling spots stamps
~Acetate and Transparencies
~Stazon Timber brown ink
~Fiskar's butterfly punch
~Wilton silk leaves
~Recollections Swirl rhinestones/pearls
~Recollections fabric covered brads
~Offray ribbon
~stick pins
~Blue Moon pearl beads

Thursday, September 5, 2013

Beautiful Awakening DT Project - The Greatest is Love...


The Greatest is Love...

One of my favorite Scriptures is 1 Corinthians 13:13. Now all of chapter 13 is amazing but verse 13 stands out to me and has.  As a little girl growing up Catholic (I no longer am) a lot of the Word of God was taught to me in song; it was how I memorized scripture and it was the first way that I learned host to communicate to God.  Since prayer was about reciting Hail Marys' and Our Fathers, I used to sing song to God about just about everything.  1 Corinthians 13:13 is one of those songs that I remember singing in my childhood. 

The New King James (NKJV) says of this verse, "And now abide faith, hope, love, these three; but the greatest of these is love." The New Living Translation (NLT) reads as, "Three things will last forever—faith, hope, and love—and the greatest of these is love." 

My project today is for "Beautiful Awakening" is centered on this scripture. 


 I made an accordion style mini album (my fav as of late) using Recollections, Union Square 12x12 collection and MME, The Station 6x6 pad. I inked every edge with Studio G pigment ink. and embellished the cover with some additional Twinery twine, and Dress-it-up buttons.

To this day I never ceases to amaze me how God will get our ear. How He will grab our attention to get a Word to us. I love this Scrioture because it speaks of what is most important to God. Verse one of this chapter says that if we do not have Love, then we are nothing but noisemakers.  People blowing a lot of hot air, sounding good but not meaning anything we say. Or as the old folks would say, "Saying a whole lot about nothing".  It is love that moves people to action, loves that restores and forgives, love that will move Heaven and Earth to get to us.

I pray this project is an inspiration to you and speaks to your heart.

Kelli


What I used...
~Recollections Union Square 12x12
~MME, The Station 6x6
~Studio G pigment ink
~Twinery twine
~Dress-it-up buttons
~Colorbok Vellum quote stack: Growing in Faith
~Studio G glitter glue