Hi Everyone,
LOOOOOOOOOONG Time I know! My two year old and 8 month old have kept me very busy. My Lil one arrived two weeks early and we have had a bit of drama since. None-the-less I have found myself with little to no time at all to do a lot of things I want to unless I work on it at work. Thank God for His favor. I have found that in order to document all the moments we share in our lives that Pocket Scrapbooking is the way to go. So this has become my new obsession. I can easily print a pic, slide it into a pocket, journal and keep moving and when I have time go back and embellish. Why I didn't jump on this bandwagon sooner I don't know.
Any who I was looking for printable sticker words/phrase sheets but couldn't find ones that I like, were free, or pertained to my life so I made my own and I want to share it with you. I a have a .PNG of words that remind me of my lil girls; things the eldest says and things they both do - you may find useful in your own scrapbooking. Just print, cut, and glue and your done.
Okay, Im rambling. You know how to use these. So there you have it.
Anyway, I pray you all have a great day!!
Love you all,
Kelli
Thursday, February 23, 2017
Wednesday, May 4, 2016
Mini Album Swaps (FB Group) Chipboard Swap
Hi Everyone,
WOW has a month gone by already? Well I am 34 weeks along and counting down to her arrival. I have been afflicted with every illness that has gone around in the last 8 months and have been feeling miserable. Just got finished with the flu and I am glad to see it go. This kid will be immune to everything under the sun!!
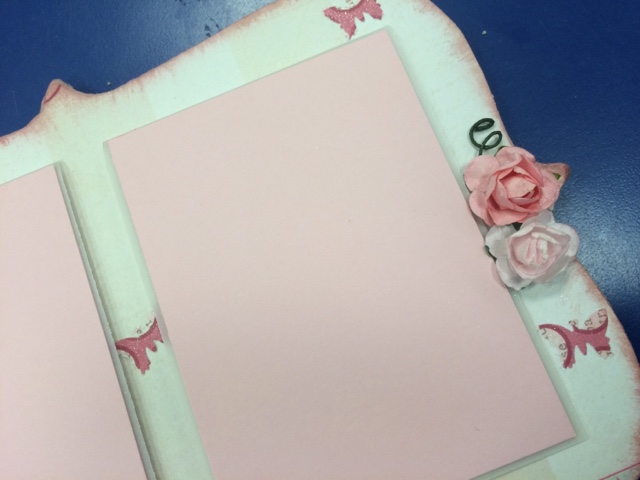
Anywho. I joined in a partner swap over at Mini Album Swaps Group on FB and this was a chipboard mini swap. So today I am sharing with you the album I made for my partner. I pray she likes it. She didn't have anything in particular that she wanted, it was my choice, but she did same she loves pinks of all shades; so here is the mini.
Lots of Photos: You have been warned!!
Front Cover
First 2 page spread
Left
Right
Journal Spot
Right side close up
2nd page layout spread
What I used...
~ Recollections™ Necessities Chipboard Kit, Small
~ My Mind's Eye™ The Best Of Lost & Found™ Paper Pad
~ Michael's $1.50 flowers
~ Trico Pink Roses
~ Clear Wink of Stella
~ Clock from Oriental Trading
~ Pink Vellum Letter Stickers
~ Fiskars Pop-up Punch - Butterfly
~ Miss Elizabeth's Vellum Letter Stickers
~ Flat Back Pearls from eBay
~ Lace Trim
~ Pink Washi Tape
~ Michael's $1.50 "You Are Loved" wooden stamp
~ Michael's $1.50 pink flat back pearls
~ Michael's $1.50 pink daisy flowers
~ Recollections™ Signature Floral Embellishments, Holly Leaves
~ Sheer Ribbon
~ Autumn Leaves Journaling Spot Stamp
~ Recollections® Vellum Paper Pack
~ Tiddly Inks Digital Stamp "Sow seeds of Love..."
~ Tim Holtz Distress Ink Pad-Victorian Velvet
WOW has a month gone by already? Well I am 34 weeks along and counting down to her arrival. I have been afflicted with every illness that has gone around in the last 8 months and have been feeling miserable. Just got finished with the flu and I am glad to see it go. This kid will be immune to everything under the sun!!
Anywho. I joined in a partner swap over at Mini Album Swaps Group on FB and this was a chipboard mini swap. So today I am sharing with you the album I made for my partner. I pray she likes it. She didn't have anything in particular that she wanted, it was my choice, but she did same she loves pinks of all shades; so here is the mini.
Lots of Photos: You have been warned!!
Front Cover
First 2 page spread
Left
Right
Journal Spot
2nd page layout spread
Right
What I used...
~ Recollections™ Necessities Chipboard Kit, Small
~ My Mind's Eye™ The Best Of Lost & Found™ Paper Pad
~ Michael's $1.50 flowers
~ Trico Pink Roses
~ Clear Wink of Stella
~ Clock from Oriental Trading
~ Pink Vellum Letter Stickers
~ Fiskars Pop-up Punch - Butterfly
~ Miss Elizabeth's Vellum Letter Stickers
~ Flat Back Pearls from eBay
~ Lace Trim
~ Pink Washi Tape
~ Michael's $1.50 "You Are Loved" wooden stamp
~ Michael's $1.50 pink flat back pearls
~ Michael's $1.50 pink daisy flowers
~ Recollections™ Signature Floral Embellishments, Holly Leaves
~ Sheer Ribbon
~ Autumn Leaves Journaling Spot Stamp
~ Recollections® Vellum Paper Pack
~ Tiddly Inks Digital Stamp "Sow seeds of Love..."
~ Tim Holtz Distress Ink Pad-Victorian Velvet
Tuesday, March 8, 2016
Post Valentines Card
Hi Everyone,
I was asked to make some Valentine's card for a woman at my church for her little girl's class party. She attends a Christian schooland the theme of this Valentine's Day was God's Perfect Love. She wanted a card that of course uses the theme but would have stars by her daughter's name. So I made some prototypes and her daughter picked out the one she liked. Here is the finished card that her daughter chose.
Now I have to admit, this card was not my first choice but she loved the sparkle on the heart!!
I stamped some hearts on the inside of the card where she (the daughter) would write her name. I did go back and add some stars around the hearts but I took these pics before the stars and I forgot to snap a pic after. Chalk it up to baby brain ;) .
All in all I think it is really simple, and cute, and I do love the glitter star!!
I printed the sentiment in gray ink on the computer and then stamped the hearts around the die cut glitter heart. Quick and Easy!
A Bit of Drama: Now if any of you remember I am sticking to my challenge of not buying anything new. Well I didnt have enough of this pink color for the card base so I had to buy some more of the Recollections paper pack. Well the stack I had and the stack that I bought with the same name did not contain the same pick card stock as it had before. So I wound up buying 3 card stock packs to try and find the correct pink shade. (I was not happy). So now I am finding ways to use it up.
So there you have it. Thanks everyone for sharing your time with me. I will blog with you all again soon.
Kelli
What I used...
~Bright White Neenah card stock (From Office Depot)
~Coral Berry and Frosty Pink Dye ink by Altenew
~Avery Elle scalloped and pierced heart die
~Heart Stamps from Studio G
~Recollections Pink Card Stock
I was asked to make some Valentine's card for a woman at my church for her little girl's class party. She attends a Christian schooland the theme of this Valentine's Day was God's Perfect Love. She wanted a card that of course uses the theme but would have stars by her daughter's name. So I made some prototypes and her daughter picked out the one she liked. Here is the finished card that her daughter chose.
Now I have to admit, this card was not my first choice but she loved the sparkle on the heart!!
I stamped some hearts on the inside of the card where she (the daughter) would write her name. I did go back and add some stars around the hearts but I took these pics before the stars and I forgot to snap a pic after. Chalk it up to baby brain ;) .
All in all I think it is really simple, and cute, and I do love the glitter star!!
I printed the sentiment in gray ink on the computer and then stamped the hearts around the die cut glitter heart. Quick and Easy!
A Bit of Drama: Now if any of you remember I am sticking to my challenge of not buying anything new. Well I didnt have enough of this pink color for the card base so I had to buy some more of the Recollections paper pack. Well the stack I had and the stack that I bought with the same name did not contain the same pick card stock as it had before. So I wound up buying 3 card stock packs to try and find the correct pink shade. (I was not happy). So now I am finding ways to use it up.
So there you have it. Thanks everyone for sharing your time with me. I will blog with you all again soon.
Kelli
What I used...
~Bright White Neenah card stock (From Office Depot)
~Coral Berry and Frosty Pink Dye ink by Altenew
~Avery Elle scalloped and pierced heart die
~Heart Stamps from Studio G
~Recollections Pink Card Stock
A Little Life Update
Hi Everyone,
I first have to thank you all for sticking around and remaining as followers on my blog. It has been 4 months and some change since I last posted anything. I have found (as many of you already know) that being a Mom to a now 20 month old is not easy!!! Since I work a full time job from 5:30am - 2pm and then when I get home at 2:15pm I instantly shift into Mommy/Wife mode. Doing laundry, running errands (hubs doesn't drive since he is legally blind), etc, etc, etc. Anywho, I find that there is little time to create in the evening unless I stay up late and don't sleep.
And then in September '15 we found out that we/I am pregnant with our second child. Another little girl we will welcome into our family in June!!!! I am so....... I can't even find the word to express the joy I have. After waiting for almost 8 years to get pregnant (after being told that we wouldn't have one without medical assistance) with our first we are now going to have a second child, naturally! God is indeed Good!!!
Needless to say I have little time and its getting shorter.
But I have found a solution.
I wake up about 4-4:20 each morning for work and I find that on the weekend I wake up about the same time and have a few hours to myself before the family wakes up. So I have been creating just haven posted. So I will show you what I have been making and hopefully it will inspire you.
I sincerely want to thank you all for sticking with me. It means a huge deal to me!!
Love you all from the bottom to the top of my heart!!
Kelli
I first have to thank you all for sticking around and remaining as followers on my blog. It has been 4 months and some change since I last posted anything. I have found (as many of you already know) that being a Mom to a now 20 month old is not easy!!! Since I work a full time job from 5:30am - 2pm and then when I get home at 2:15pm I instantly shift into Mommy/Wife mode. Doing laundry, running errands (hubs doesn't drive since he is legally blind), etc, etc, etc. Anywho, I find that there is little time to create in the evening unless I stay up late and don't sleep.
And then in September '15 we found out that we/I am pregnant with our second child. Another little girl we will welcome into our family in June!!!! I am so....... I can't even find the word to express the joy I have. After waiting for almost 8 years to get pregnant (after being told that we wouldn't have one without medical assistance) with our first we are now going to have a second child, naturally! God is indeed Good!!!
Needless to say I have little time and its getting shorter.
But I have found a solution.
I wake up about 4-4:20 each morning for work and I find that on the weekend I wake up about the same time and have a few hours to myself before the family wakes up. So I have been creating just haven posted. So I will show you what I have been making and hopefully it will inspire you.
I sincerely want to thank you all for sticking with me. It means a huge deal to me!!
Love you all from the bottom to the top of my heart!!
Kelli
Tuesday, October 27, 2015
New One Sheet 12x12 Folded Mini Album tutorial & Mini Album Monday (MAM)
Hi Everyone,
So I am starting a new project. Some may recall my attempt at Mini Album Monday (MAM) some time ago. The problem with MAM is that I had more Mondays than I had completed albums at the time. LOL. So I am going to do MAM once again but this time once a month to start and then we will see how it progresses.
SO I started a new mini and I am doing a tutorial on it. I have a lot of ideas and not sharing them is not helping me any. So here we go.
To construct this album you will need 12x12 paper. As many sheets as you want pages. I am using 5 sheets of Colorbok card stock. It's a great weight to create the pages. This is also the same process that I used to make this album here only I used 8.5x11 size card stock for the pages.
1. Score your paper on the vertical at 3". Rotate the paper 180* and score at 3 1/8". You should have a page that looks like this.
2. Fold on the vertical score lines and then turn the paper horizontally and score at 7". Your page should look like this. (I pray you can see the score mark).

3. Cut on the 7" mark up to those original score lines that are now horizontal.
4. Now Fold on the vertical score line the is in between the two cuts.
5. Time to assemble. We now have two sections. Place your adhesive on the edge of the top and bottom sections. Just on one side. I chose to put the glue on the right side and fold my left flap on top of it. You may want the flaps of each section to be glued identically. I alternated for purpose of the photo. You also want to use a strong adhesive. For this photo I am using my ATG but sticky strip, score tape, or even liquid adhesive would be great here.

6. Now this smaller section is going to form a pocket. Depending on whether or not you want the opening on the right or the left determines where you are going to place your adhesive.
I chose to place the adhesive on the right side for an opening on the left when the flap is closed. And now your page is complete. You just have to repeat the process for however many pages you choose to have in your album.
To make the pockets you will need to seal one side of the open pocket (see pic above), whether the right or the left side, depending on which way you want your pocket to face.
Binding:
Now you can bind however you choose but here are three methods that you may want to try.
1. "Hidden Hinge" Kathy Orta has a video about a binding method she brought to the public that would be great with this album. This is the type of method I used when I made my Christmas Album.
2. Another option is to use a Cinch, Bind-it-All, or binder rings.
3. Any other method that you prefer.
I am trying to get a video version of this tutorial uploaded but life with a 1 yr old is not that easy. Especially when she likes to pretend she is Mommy and wants to play with the keyboard and mouse. LOL.
But I will update this post once I get the video finished. Let me know if any of these instructions are not clear.
And there you have it.
Kelli
Tuesday, October 6, 2015
New One Sheet Mini Album
Hi Everyone,
The fall is upon us and that means that the holidays are right around the corner. I am looking forward to taking lots of pictures of my lil girl picking apple, and pumpkins, and participating in fall events, and thanksgiving and Christmas, whew! This means that I need a place to put all those pics and its no fun just letting them sit in the computer so I have started to create some easy photo albums where the measurements can be adjusted to fit different size photos.
I am still on my challenge not to buy any new paper, etc till I use what I have, I have caved a bit when it came to stamps but I am going strong with not buying paper.
So today I sharing a super simple, One Sheet Mini Christmas Album with you. Each page is made of one 8x11.5 sheet of card stock.
Here is the video ..
The fall is upon us and that means that the holidays are right around the corner. I am looking forward to taking lots of pictures of my lil girl picking apple, and pumpkins, and participating in fall events, and thanksgiving and Christmas, whew! This means that I need a place to put all those pics and its no fun just letting them sit in the computer so I have started to create some easy photo albums where the measurements can be adjusted to fit different size photos.
I am still on my challenge not to buy any new paper, etc till I use what I have, I have caved a bit when it came to stamps but I am going strong with not buying paper.
So today I sharing a super simple, One Sheet Mini Christmas Album with you. Each page is made of one 8x11.5 sheet of card stock.
Here is the video ..
Here are some stills...
If you are interested, let me know, and I will publish the tutorial on how to make this album.
Here is the tutorial: http://favor8favors.blogspot.com/2015/10/new-one-sheet-12x12-folded-mini-album.html
And there you have it,
Kelli
What I used..
-Recollections White Card stock
-Recollections Jolly & Bright Paper stack
-Fiskars Kaleidoscope Punch
Here is the tutorial: http://favor8favors.blogspot.com/2015/10/new-one-sheet-12x12-folded-mini-album.html
And there you have it,
Kelli
What I used..
-Recollections White Card stock
-Recollections Jolly & Bright Paper stack
-Fiskars Kaleidoscope Punch
Subscribe to:
Posts (Atom)